


Navi1200 User Manual
Author:Dongguan Enfitnix Technology Co. Ltd.
Click:
Time:2024-08-21 09:32:33
![]()
User Manual Rev 0.0
Navi1200/Navi1200WL
Smart Bicycle Front Light
© 2024 by Enfitnix Technology Co. Ltd.
1. Product Specification
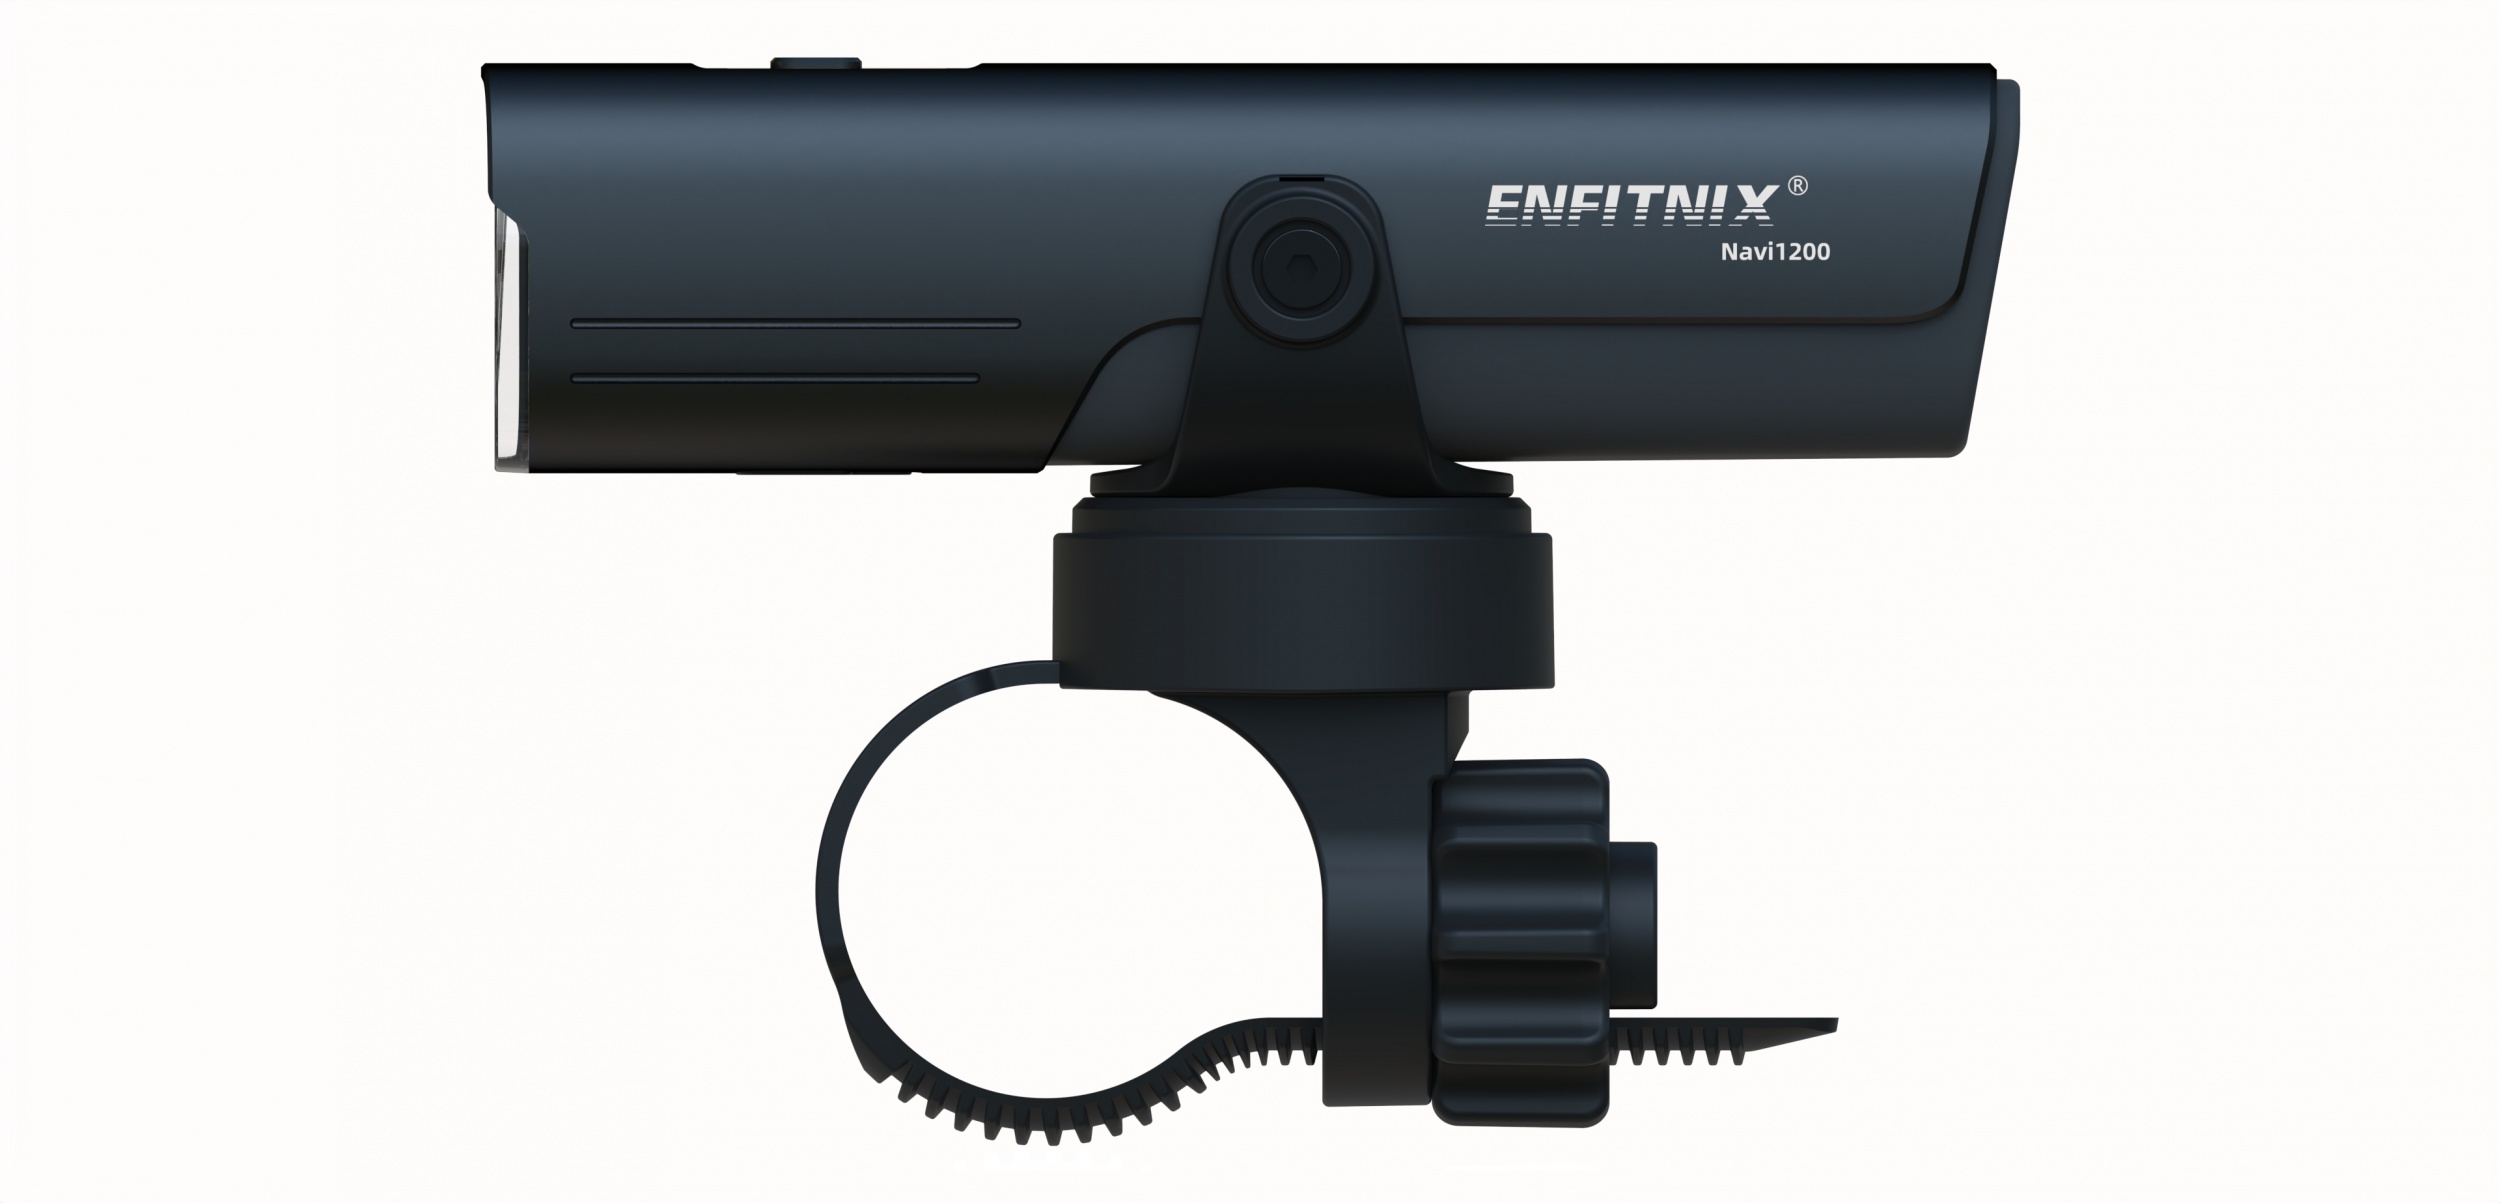
Product Name: Navi1200 Smart Bicycle Front Light
Dimensions: L:112.5mm W:38mm D:35mm
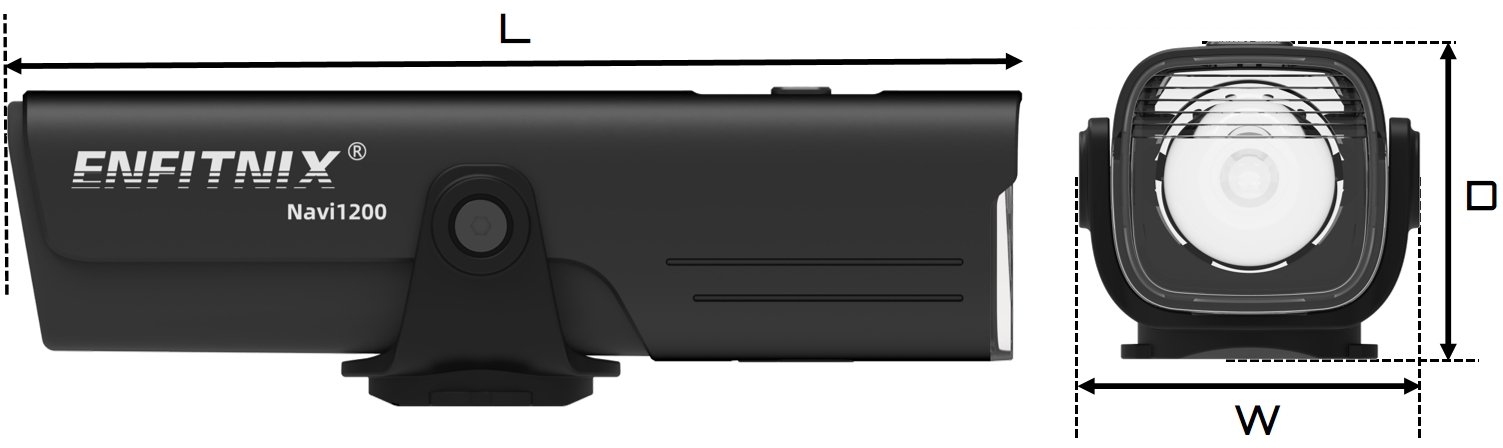 Fig.1
Fig.1
Operation Mode | Auto/Manual |
Battery | 5000mAh rechargeable Lithium-ion battery |
Run Time | 10hrs@300Lm, 4hrs@600Lm, 3hrs@900lm, 2hrs@1200Lm, 8hrs@Flash Mode. |
Weight | 153g±2% |
Color: | Black |
Waterproof | IPx6 |
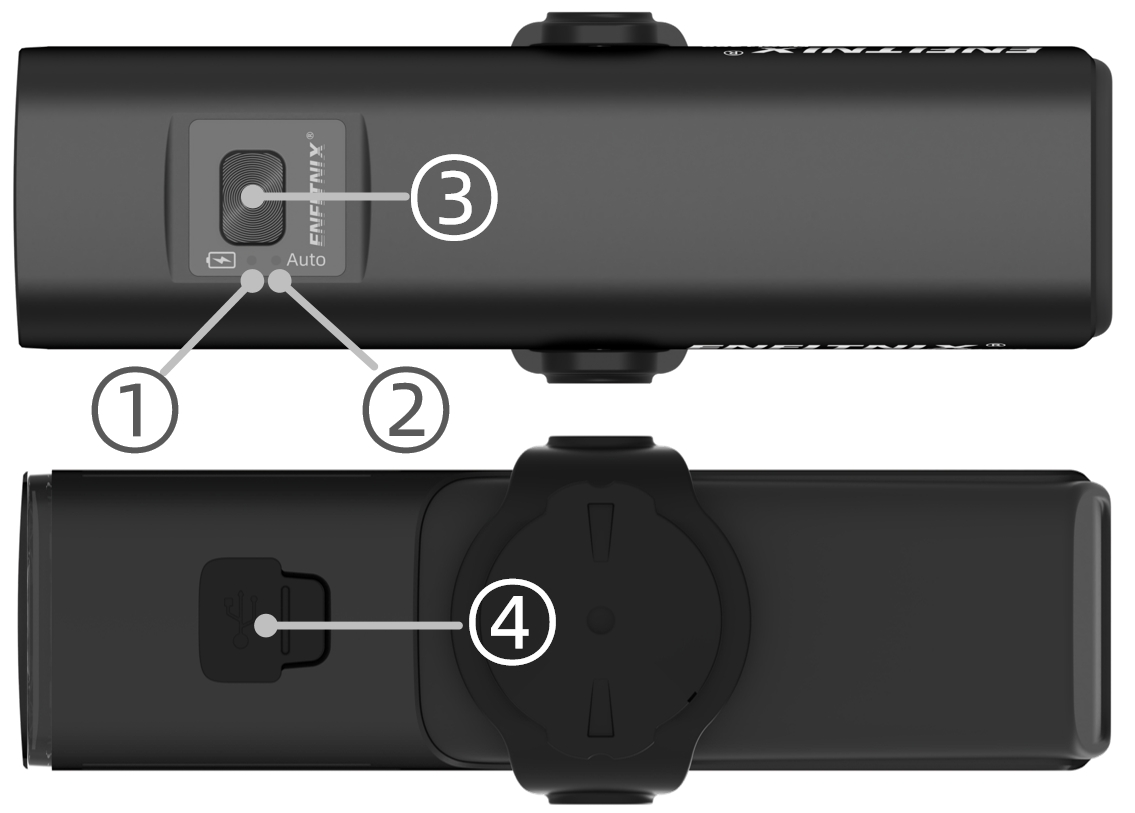
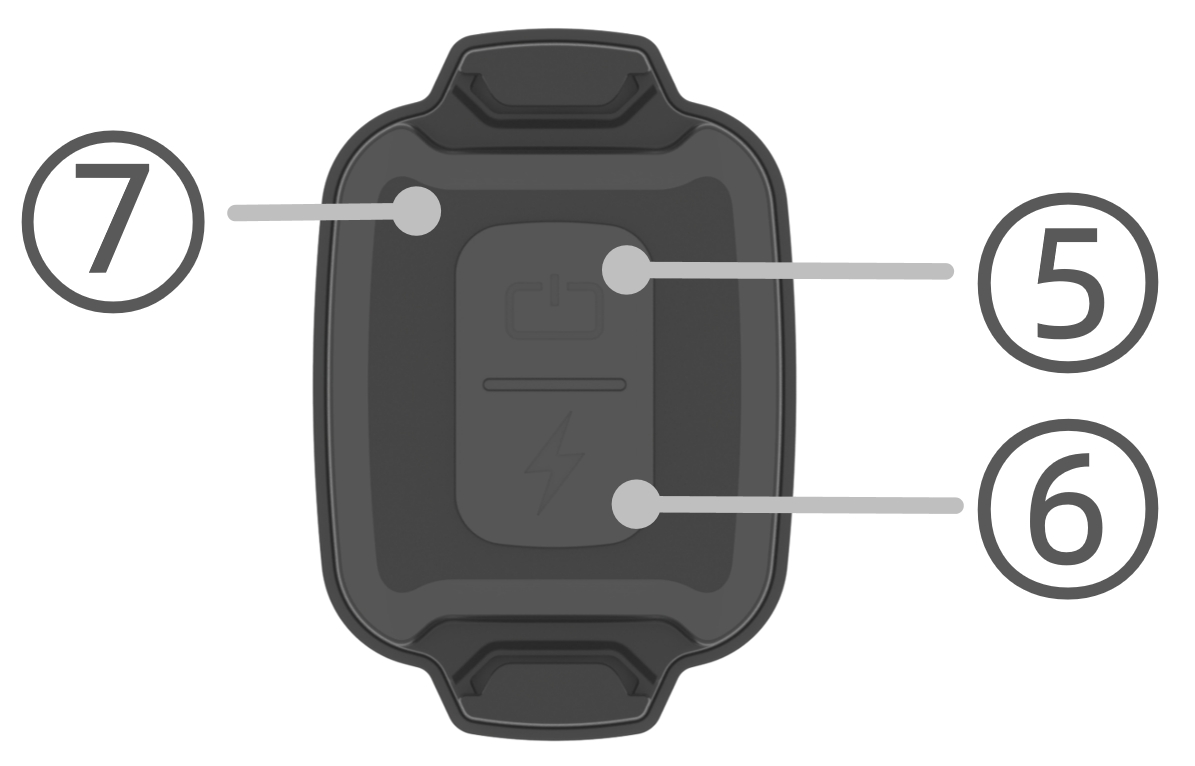
Fig.2
① Battery lower(Red)/charge(Green) indicator
② Auto mode indicator
③ Function button
④ Rubber seal and USB port
⑤ Remote function button
⑥ Max power button
⑦ Remote indicator
2. Package Content

Fig.3
3. Operation and functionality
Navi1200 comes with a motion sensor which allow the light to detect if the user is moving the bike and turning on/off the light automatically.
Key Function:
Operation | Function |
Single Click | Change the output power or turn on the light |
Double Click | Switch between Auto mode and Manual mode |
Press down > 1s | Switch off * |
Press down > 5s | Enter paring mode** |
Note:* When operating in Auto-mode the light will be turn on again if motion is detected .
**Only works on the Navi1200WL, exit by press the function button.
Auto/Manual mode
The Navi1200 supports two operation modes which can be changed between the two modes by double clicks the button.

Fig.4
4. Remote Controller(Navi1200WL only)
The Navi1200 WL support remove control.
To paring the Navi1200 with the remote,please followthe following steps below:
1) Turn on the the Navi1200WL,and make sure the battery in the remote is installed and the protection sheet has been removed.
2) Press down the function button③ on Navi1200 until the Auto Mode Indicator② start to blink.
3) Press down Function Button⑤ and Max Power Button⑥ on the remote until ② stop blink.
4) Clink any button on the Remote to exit the paring mode(Remote Indicator stop blinking⑦).
5. Charge the battery
When the battery is running low, the battery indicator ①in Fig.2 will start to blink.
Charge the battery
Remove the rubber seal ④ on the button of Navi1200 and charge the battery via the USB connector,the charge indicator ① will blink in Green. Battery will be fully charge in 2.5~4 hours. Charge indicator ② will turn on Green when charge completed.
6. Installation
Handlebar mount:
Mount the handlebar bracket ① to the handlebar. Then insert the Navi1200 ② and turn 90 degree ③.
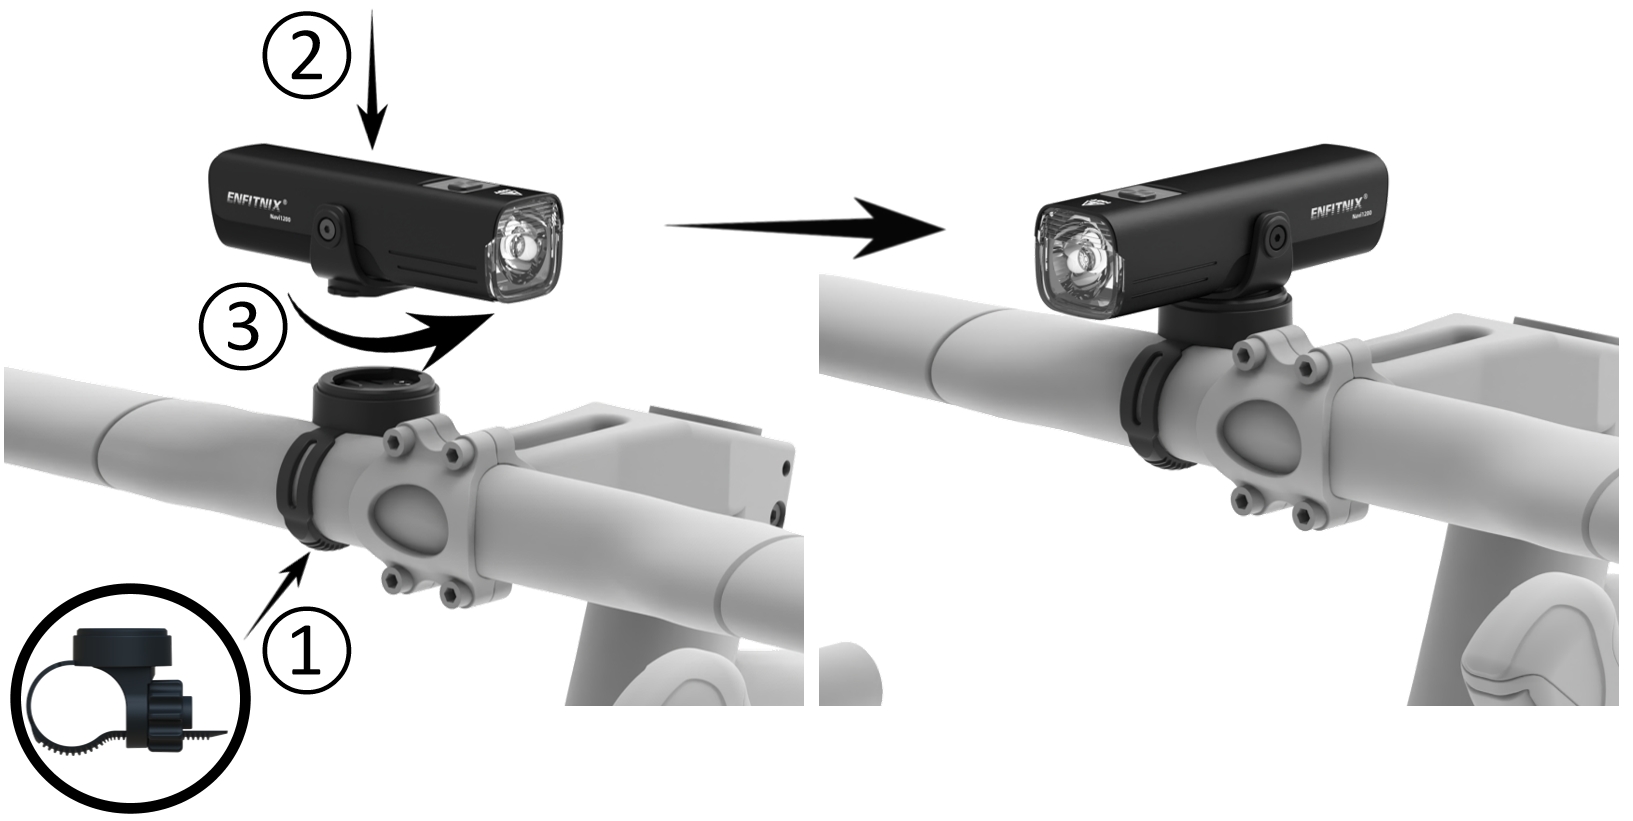
Fig.5
Cycle Computer Mount (GroPro Adaptor)
Install the GoPro adaptor ① to a standard cycle computer bracket (with GoPro mount). Insert the Navi1200 ② and turn 90 degree ③.
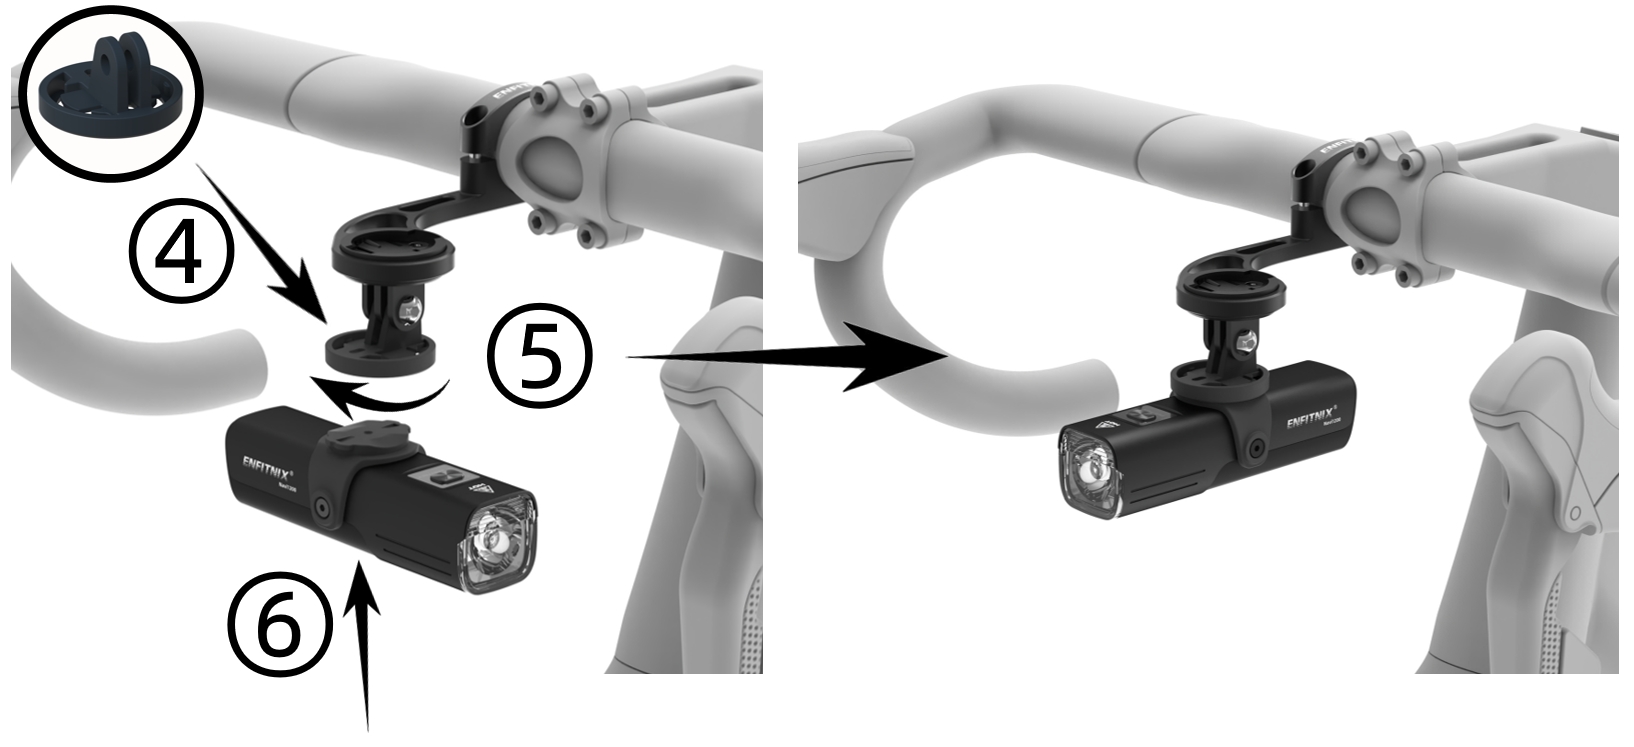
Fig.6
7. Warranty
The product is covered by a one year warranty.

Dongguan Enfitnix Technology Co., Ltd.
Customer Service: ecs@enfitnix.com
© 2024 by Enfitnix Technology.
![]()

Tel: +86 (0) 769 22234810 Email: sales@enfitnix.com
Dongguan Enfitnix Technology Co., Ltd.
Address: 1703, Block 2, No.11, LiaoBuYanHeNan Rd.,SongHuZhiGu Sci&Tech Park, Liao Bu, Dongguan, Guangdong, China. Postcode:523000
Enfitnix Technology North America Inc
Address: 4101 Power Inn Road, Suite A, Sacramento CA 95826

点击右上角
分享给朋友吧
Copyright @ Foreign Trade Template Station 2020 Site Map
