


MagiQ Smart Graphic Tail Light User Manual (English)
Author:Dongguan Enfitnix Technology Co. Ltd.
Click:
Time:2024-05-14 10:25:13
User Manual Rev 0.1
MagiQ Smart Graphic Tail Light
DongGuan Enfitnix Technology Co., Ltd.
Please Note:Specification are subject to change without notices.
© 2024 by ENFITNIX Technology Co, Ltd.
1. Product Specification
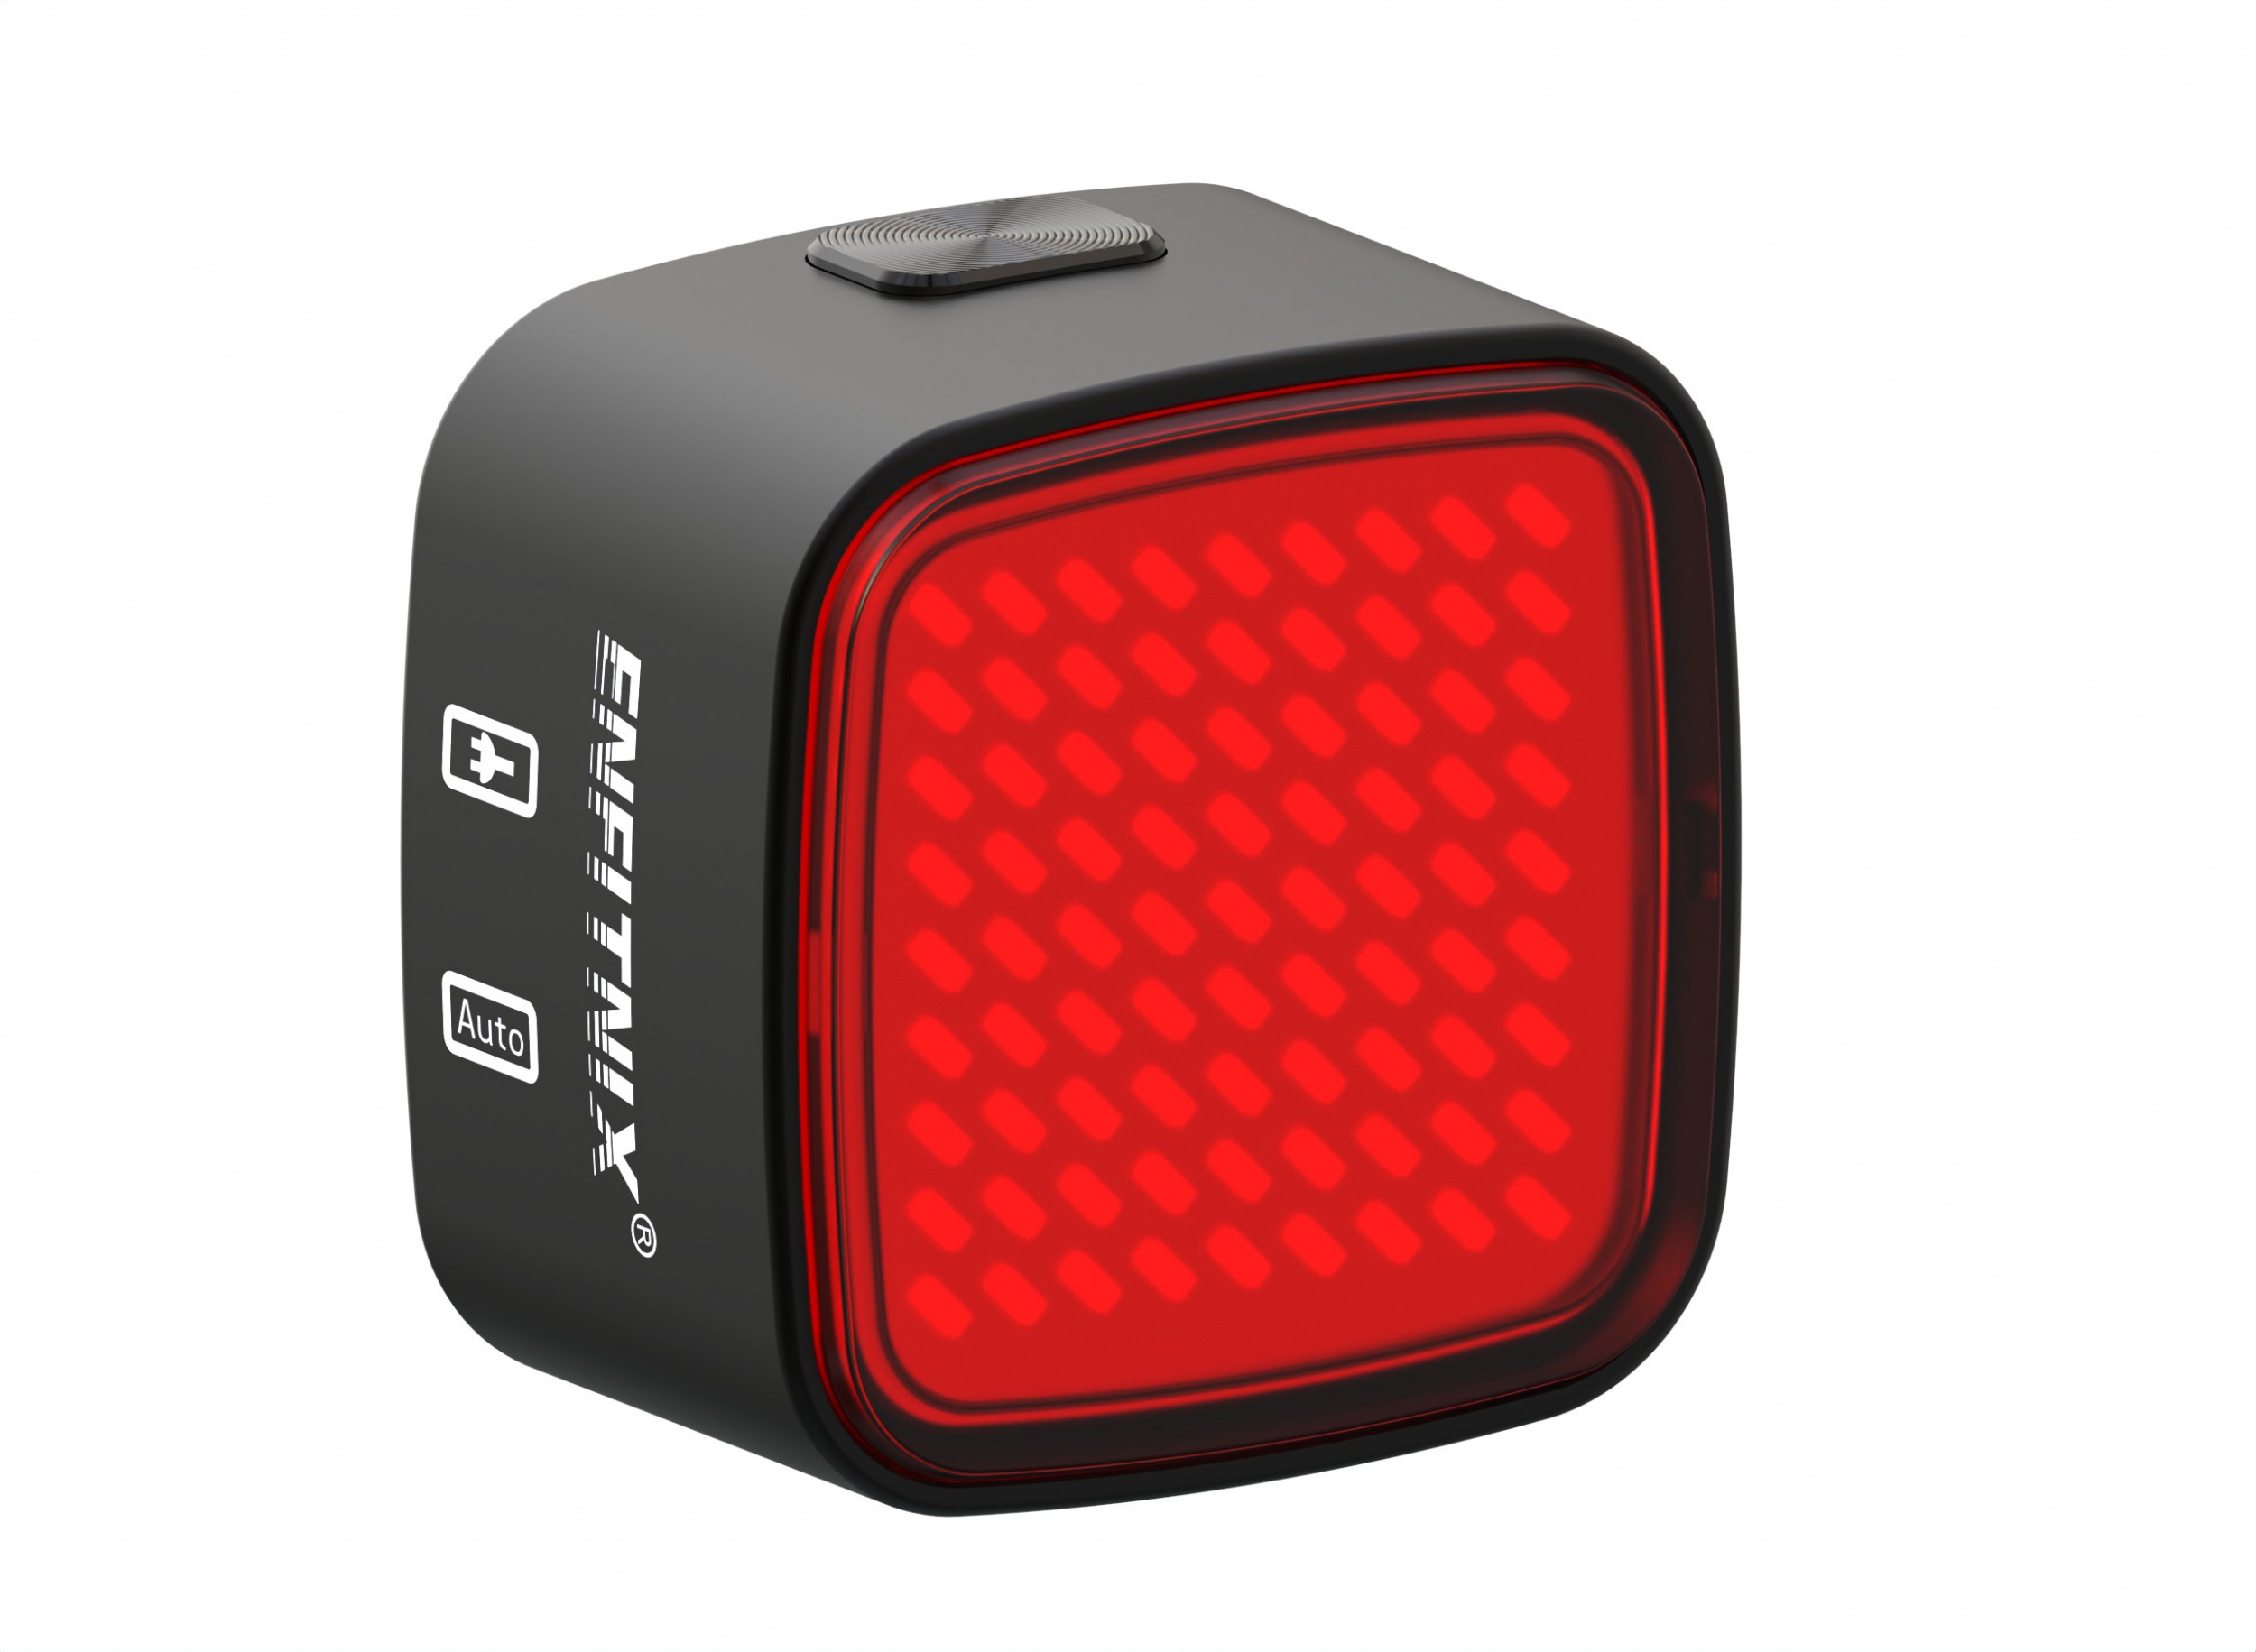
Product Name: MagiQ Smart Graphic Display Taillight
Dimensions: See Fig.1
Mode: Flash1, Breath, Costant on, Burst,Graphic display
Battery: 400mAh Rechargeable Lithium-ion Battery
Run Time: 2~54hrs
Weight: 30g(Without mounting bracket)
Color: Black
Waterproof: IPx6
Input: DC5V 0.5A
Wireless System: BLE 5.3
Resolution:11x11pixals
① Auto Mode Indicator
② Power Button
③ USB Port
④ Charge Indicator

Fig. 1
2. Accessory
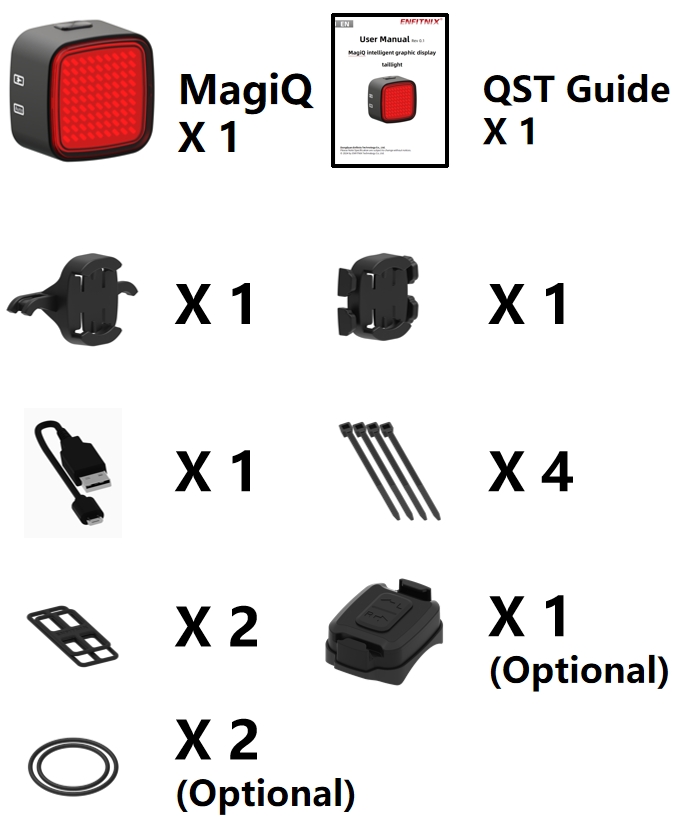
Fig. 2
Note:
Only MagiQ with turning light provide the remote control and mounting straps.
3. Operation and functionality
Power button (② as in FIg.1)
The Power Button is abel to change the flash mode、working mode or turn on/off the light.
Operation | Function |
Single Click | Change the flash mode/Turn on |
Double Click* | Switch between Auto and Manual mode |
Press down for more than 1s | Switch off ** |
Press down for more than 5s | Pair with the remote |
Press down for more than 10s | Restore factory settings |
Table.1
Note:
*The “AUTO”LED indicator (Fig.1 ②)will start to blink when operate under Auto mode.
**The light will turn on automatically in“Auto”mode if motion detected.
Operation and Condition for Tail light
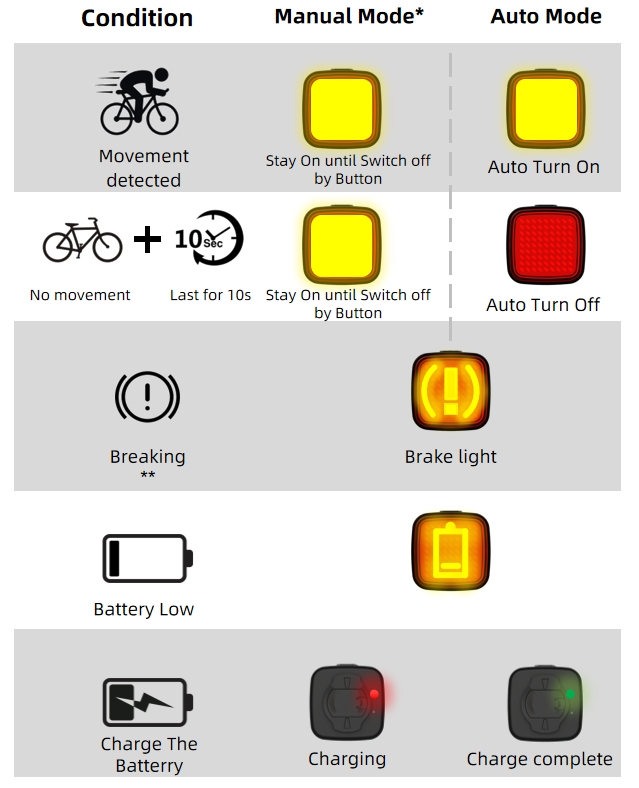
Fig. 3
Note:
*Only the button(Fig.1 ②)can turn off the light when operating under“Manual”mode.
**Brake sensing mode is off in default setting. It can enable in EFXLink in “Settings”manul as shown in Fig. 8.
4. EFXLink
4.1. EFXLink download and installation
MagiQ can connect to EFXLink via the Bluetooth connection, allowing users to create personal display pattern and set display order on EFXLink. It can also customize the order of display animations through conditional display sequences.
In addition, EFXLink allows users to upload, publish, download, and share artworks through Creative Workshop.
To download the EFXLink, please scan the following QR codes:
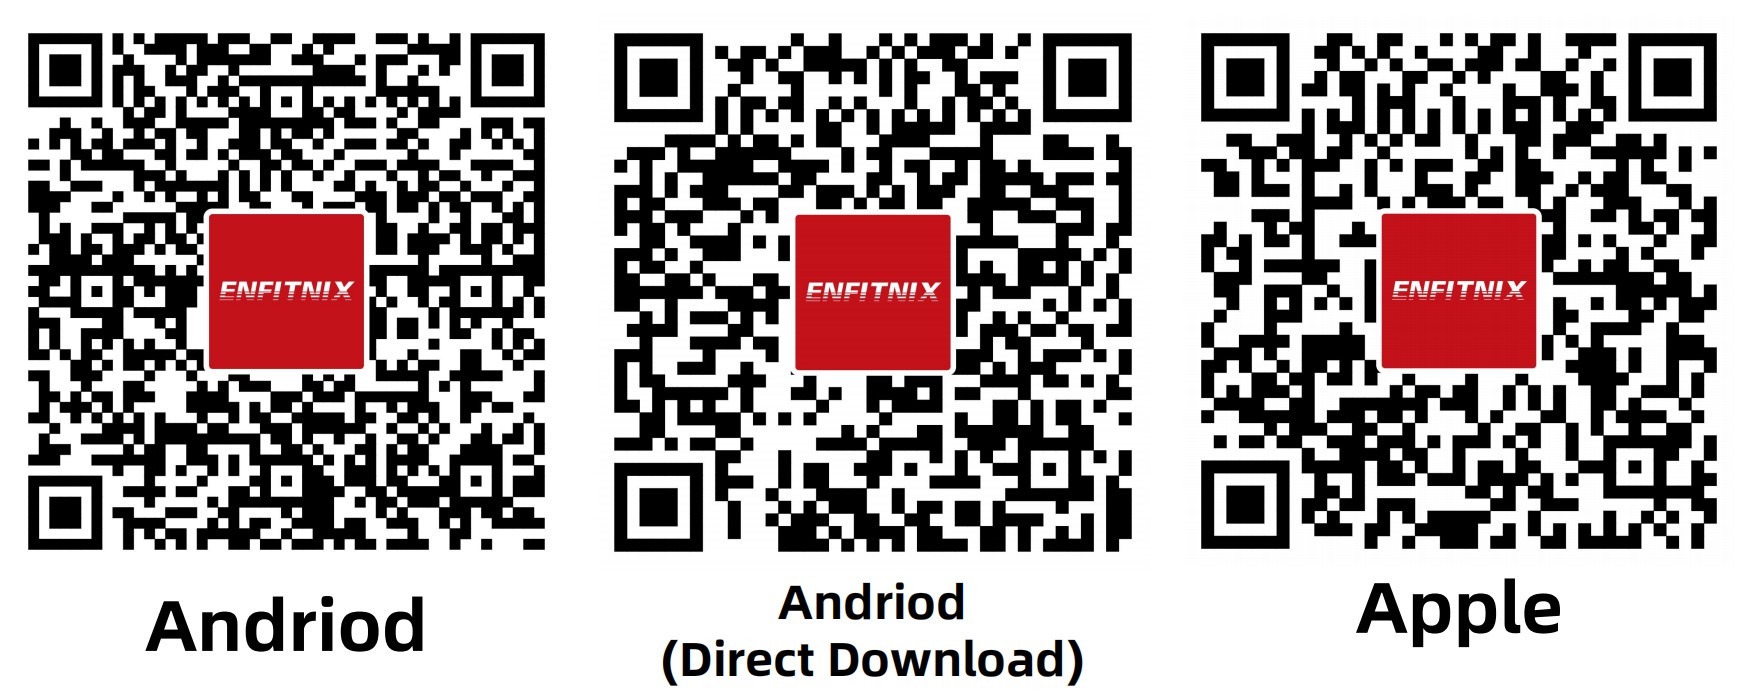
Fig. 4
Or download EFXLlink through the following link:
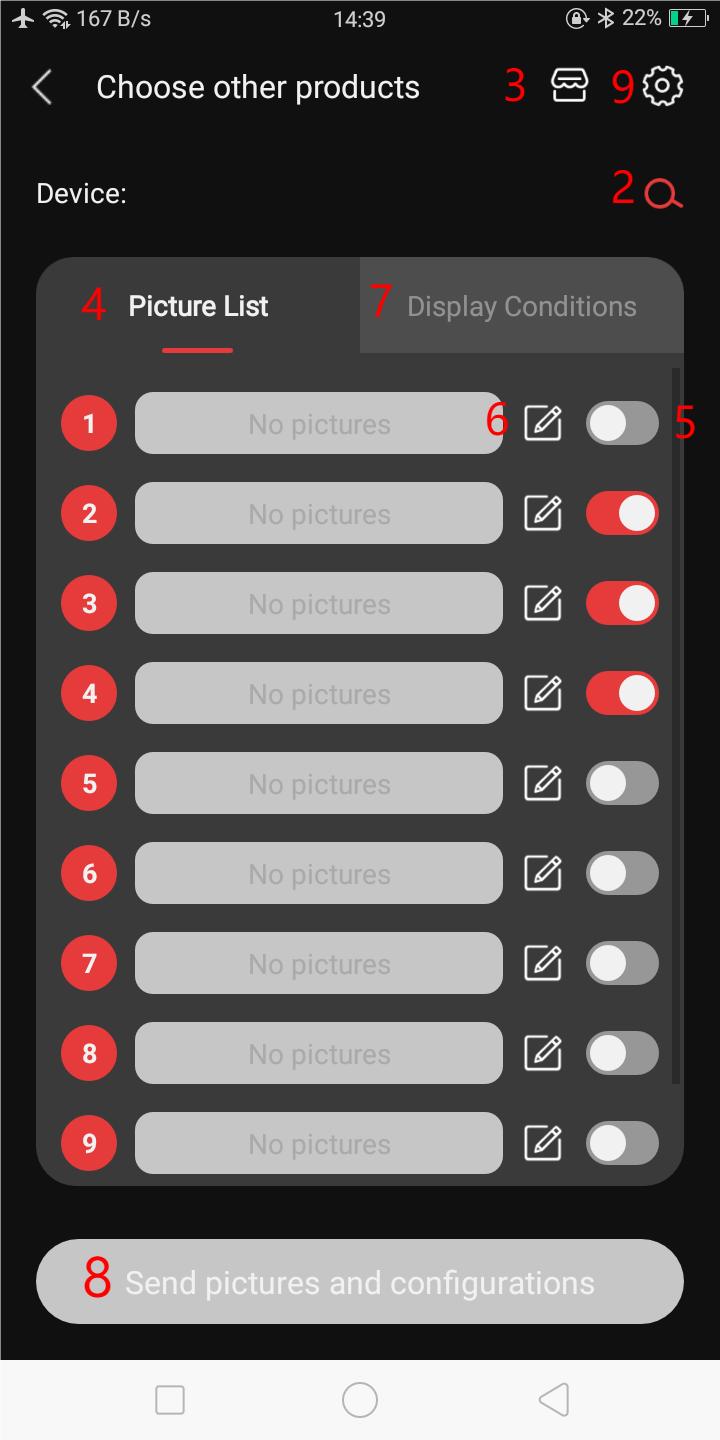
The function description for EFXLink is shown as below:
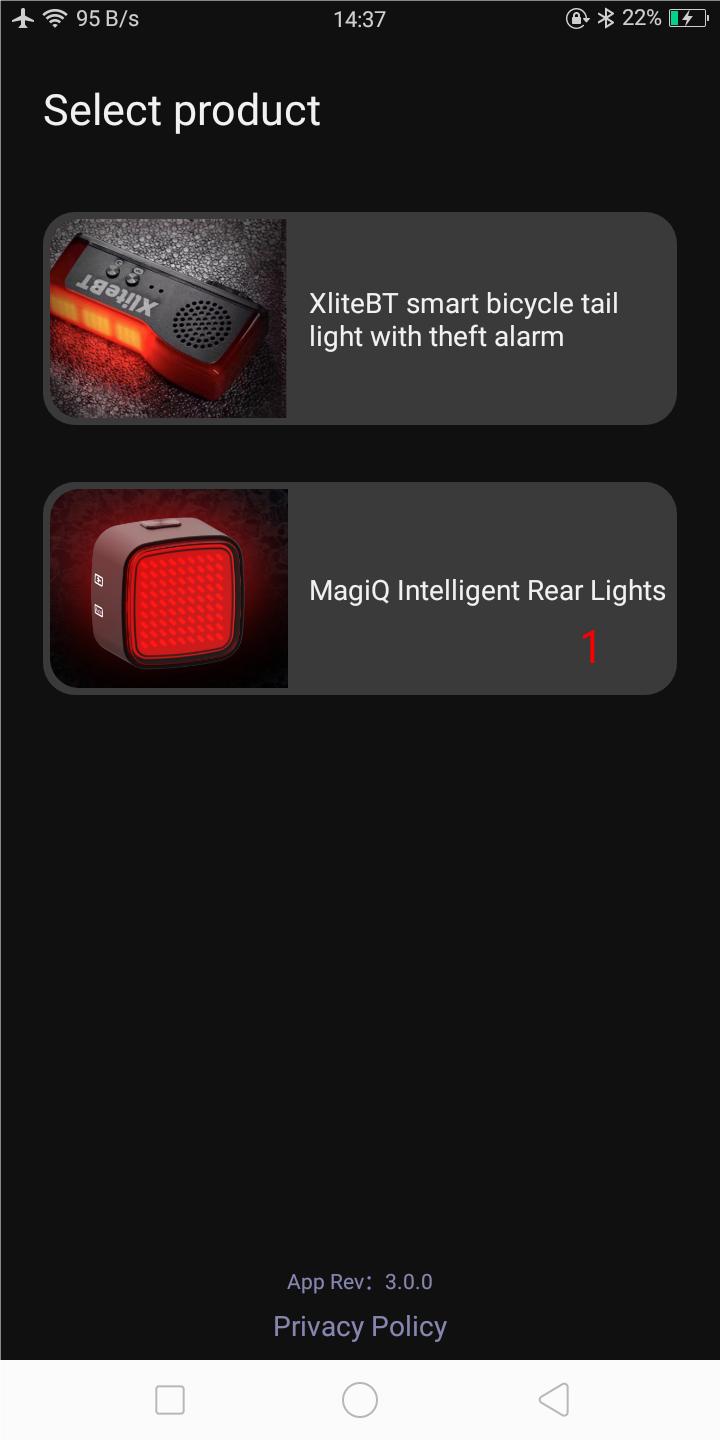
1: Product selection
2: Search the product
3: Creative workshop
4: Picture List
5: Image enable switch
6: Edit image
7: Condition display list
8: Send pictures and configurations to the tail lights
9: Settings menu
10:Edit picture
11:Insert one frame to the picture from local library or create one frame to local library
12:Display configurations
13:Import from picture
14:Upload to the Creative Workshop
15:Delete all frames in this picture
16:Drawing area
17: Copy the current frames
18: Copy all frames
19: Paste single current frame or all frames
20: Reverse color
21: Erase the current frame
22: Save design
23: Frame switch
24: Convert text to a frame
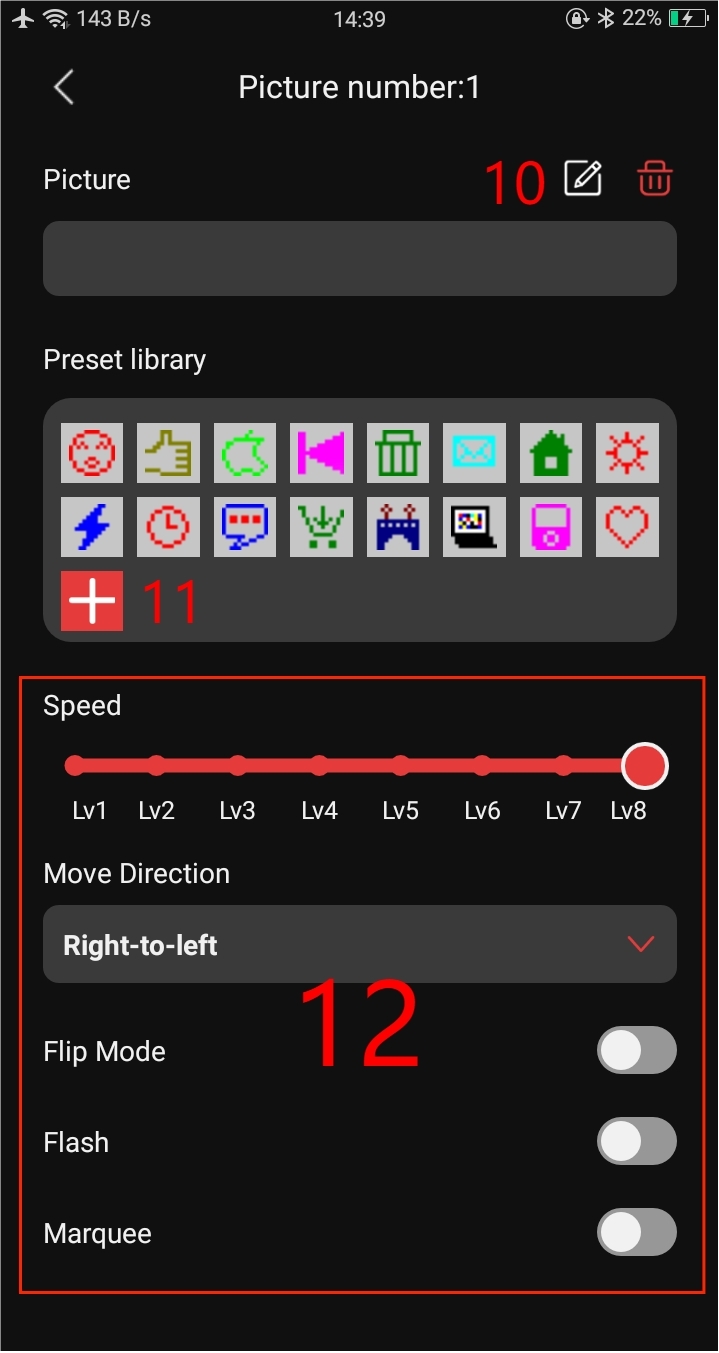
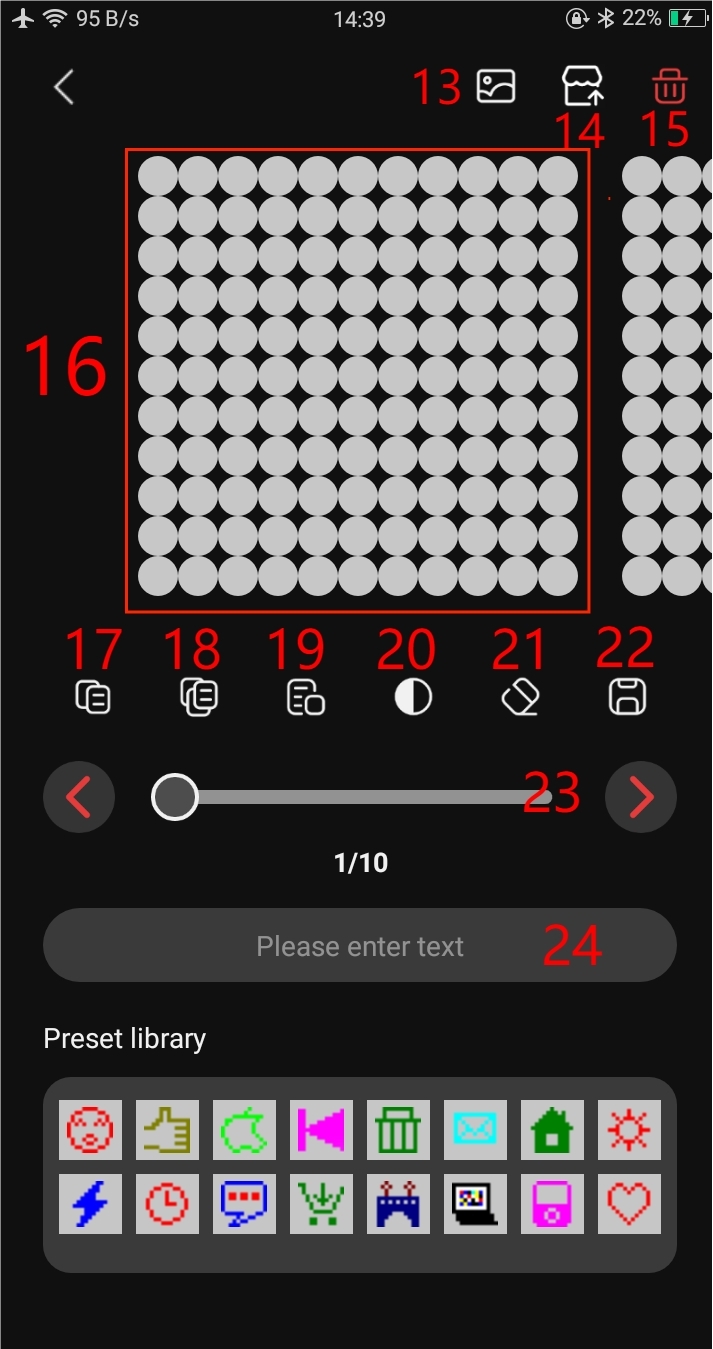
Fig. 6
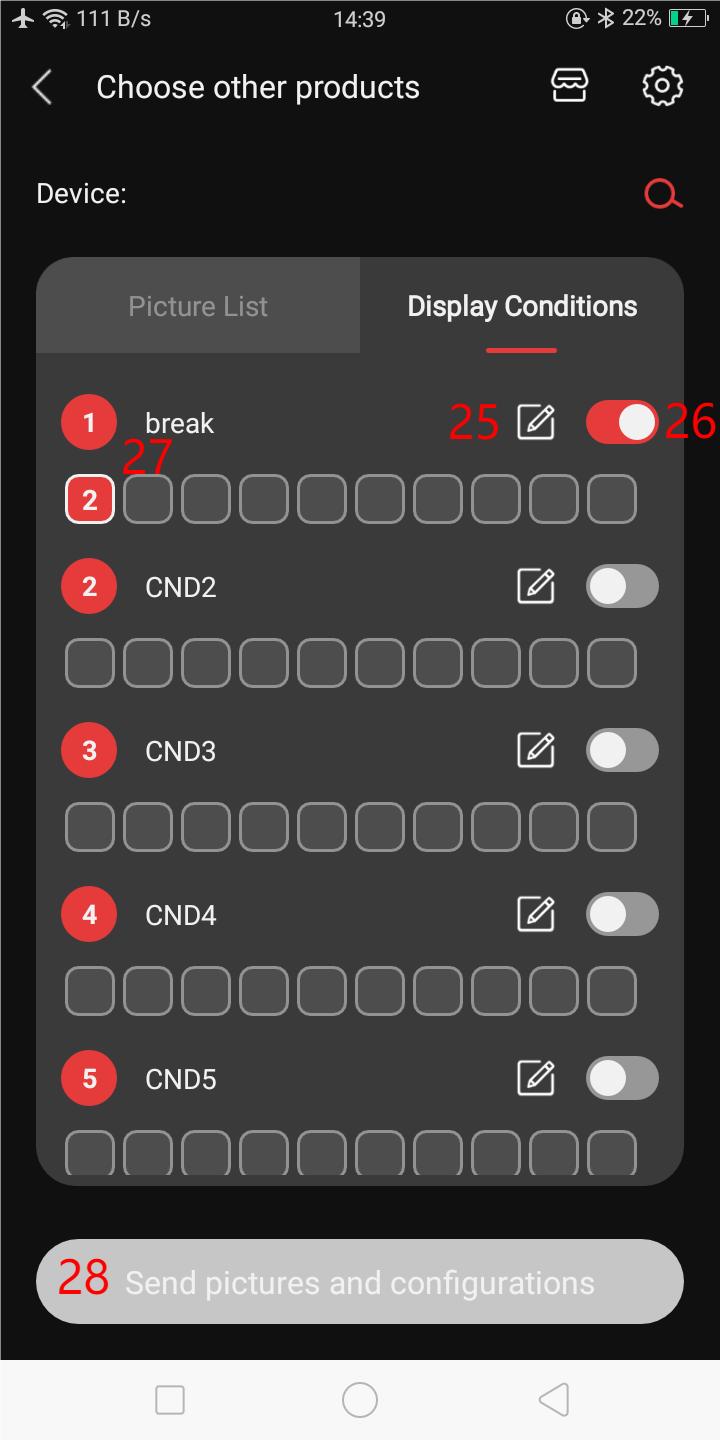
25:Condition display setting
26:Condition display enable
27:Condition display order
28:Send condition display configurations
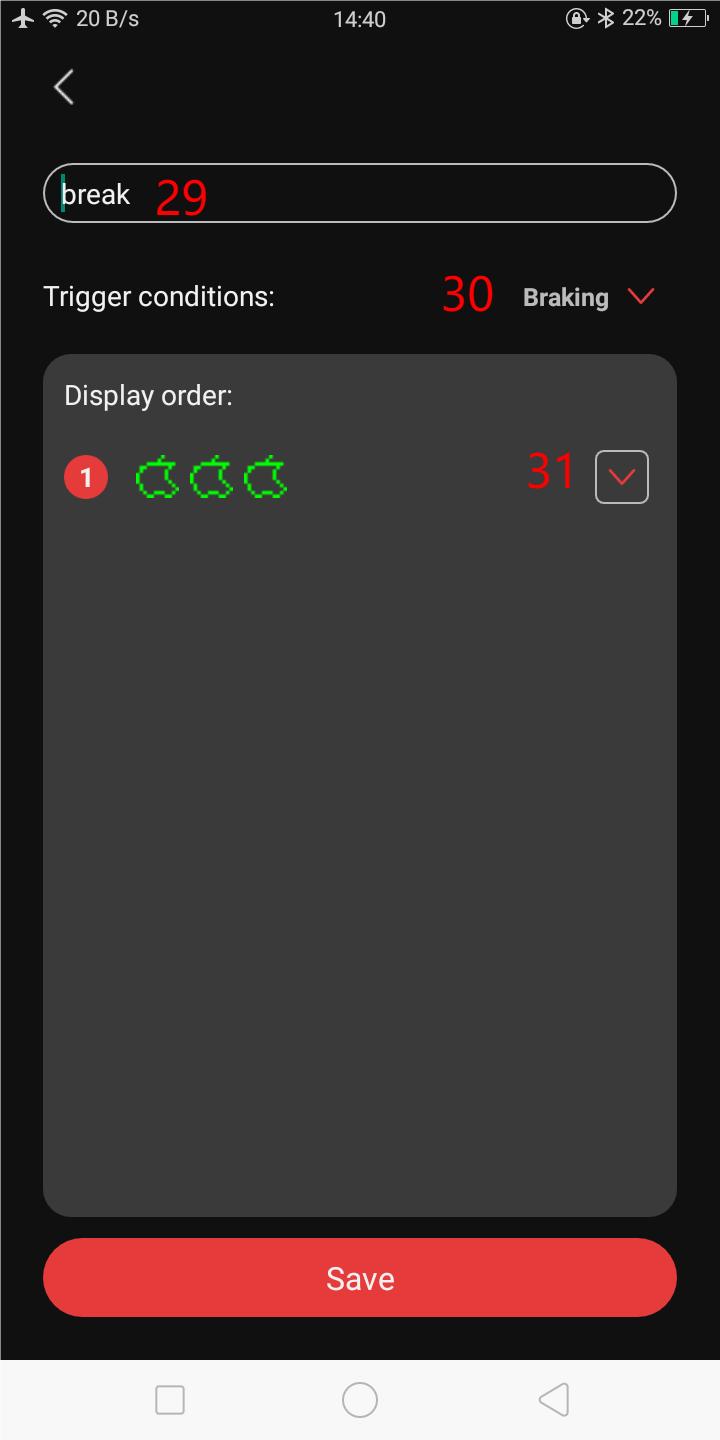
29:Customize name of the condition display
30:Trigger condition of the display sequence
31:Display sequence configuration
32:Language selection
33:Auto/Manual Mode selection
34:Brake sensing enable switch
35:Turning light enable switch
36:Brightness adjustment
37:Battery level
38:Firmware update
39:Restore factory settings
Note: Need to connect to the MagiQ before enter settings menu
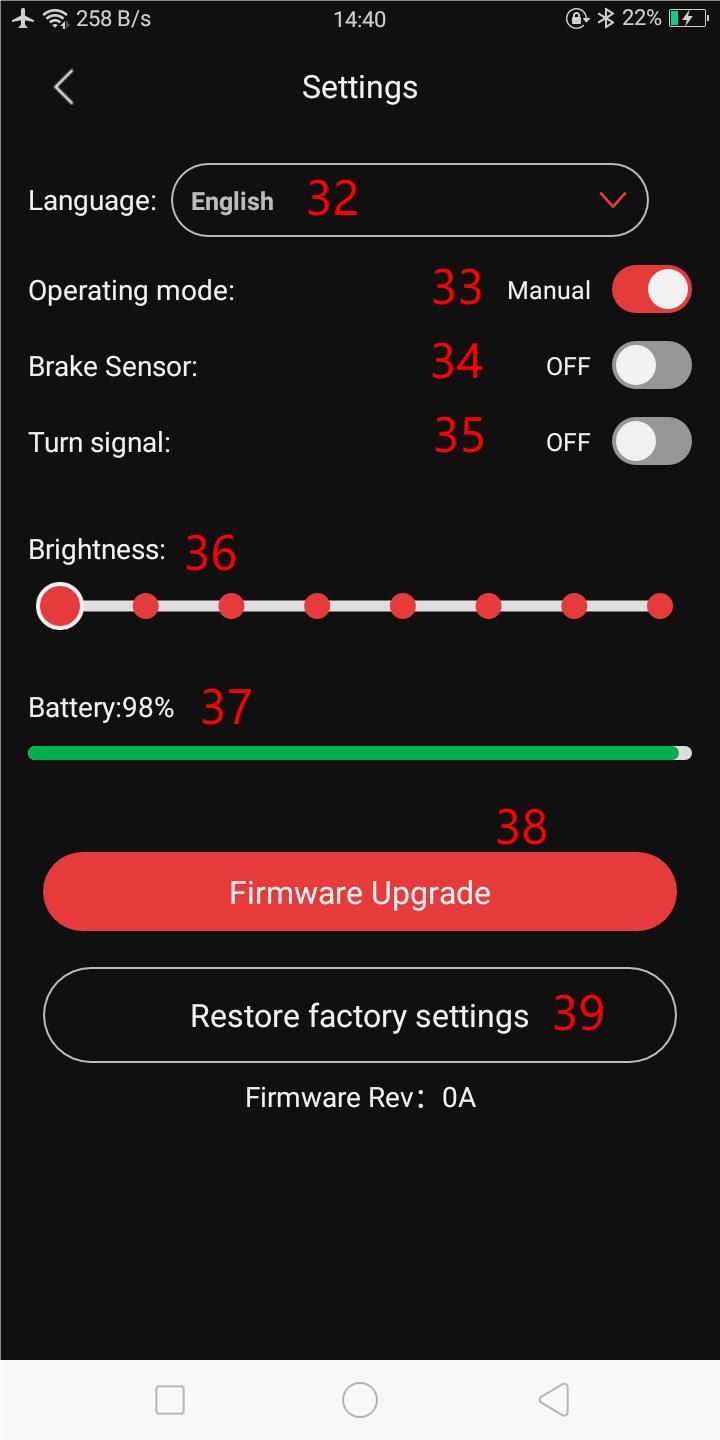
Fig. 8
4.2. Edit the picture
It is allow to edit a single frame or edit the whole picture:
Edit a single frame
Edit a single frame is only create one frame on the local libary and it can not upload to the Creative workshop. To edit a single frame, need to click the “+”(11) as shown in Fig. 12
Edit a picture
A picture including can have 10 frame maximun, and it can upload to the Creative workshop。
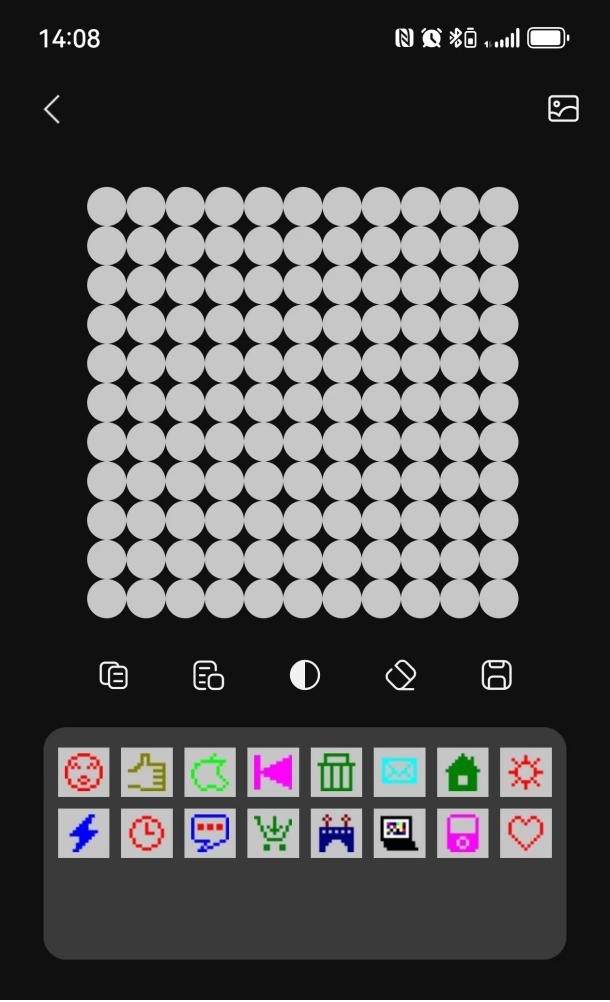
Fig. 9 Edit a single frame (left)/Edit a picture(right)
4.3. Condition display sequence
Condition display sequence allow user to set a trigger condition and display a set of pictures that seleted by the user when the condition has met. For example, the setting as shown in Fig. 10 will display picture3, 2 and 10 one by one when braking is detected .
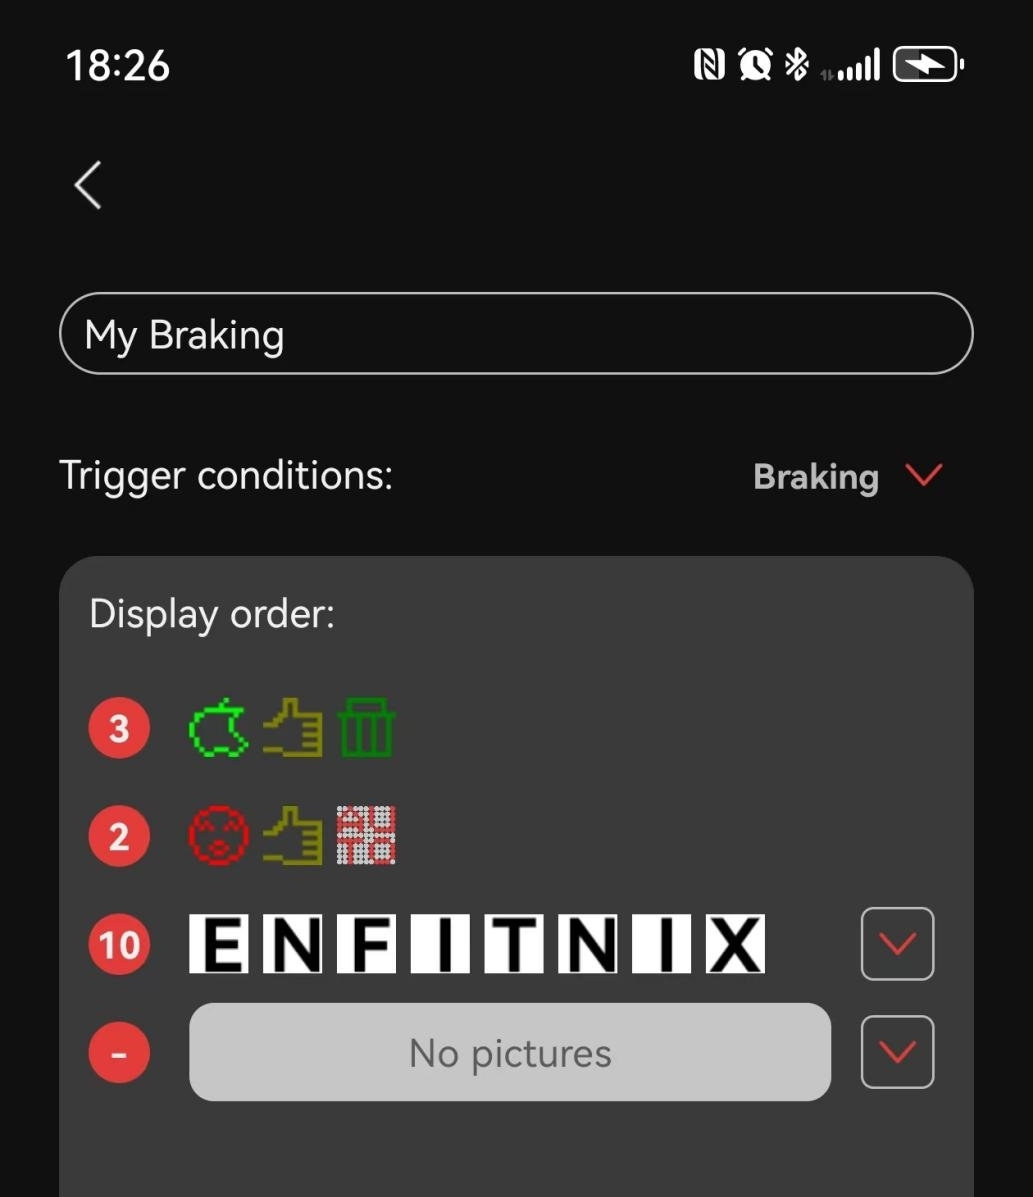
Fig. 10
4.4. Creative workshop
The Createive Workshop allow user to create their own design and share with other. It also allow user to download the designs from other users.
In the main screen of the MaigQ as shown in Fig. 5 , enter the creative workshop by clicking ![]() . After logon or register a new account, you can now upload your design to the Creative Workshop and allow other to view/download your design. Meanwhile, you can also download designs from others.
. After logon or register a new account, you can now upload your design to the Creative Workshop and allow other to view/download your design. Meanwhile, you can also download designs from others.
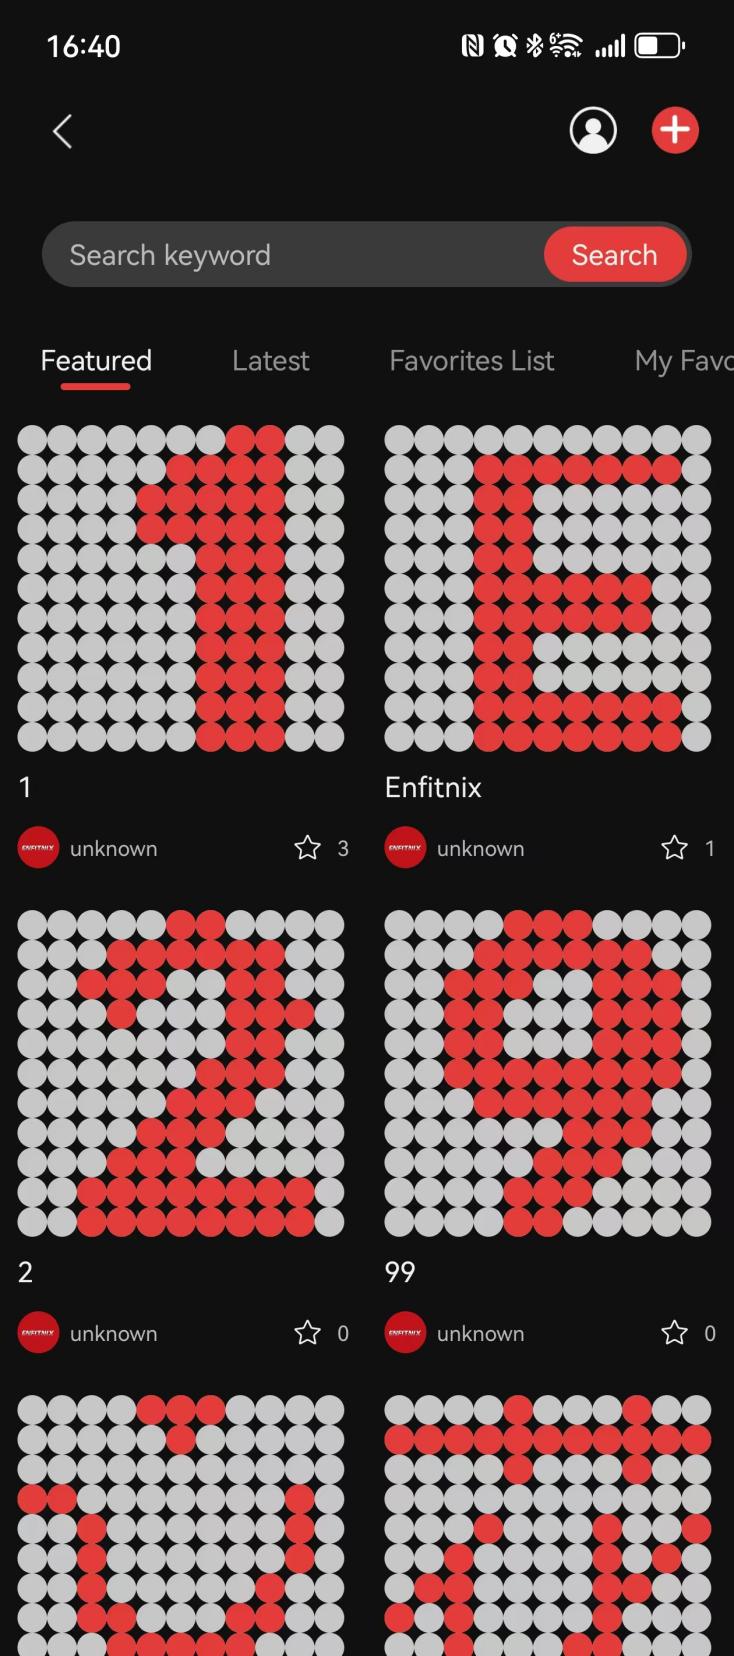
Fig. 11
5.Installation
Seatpost mount
Step1:Tighten the Seatpost Mount Bracket with the rubber band.
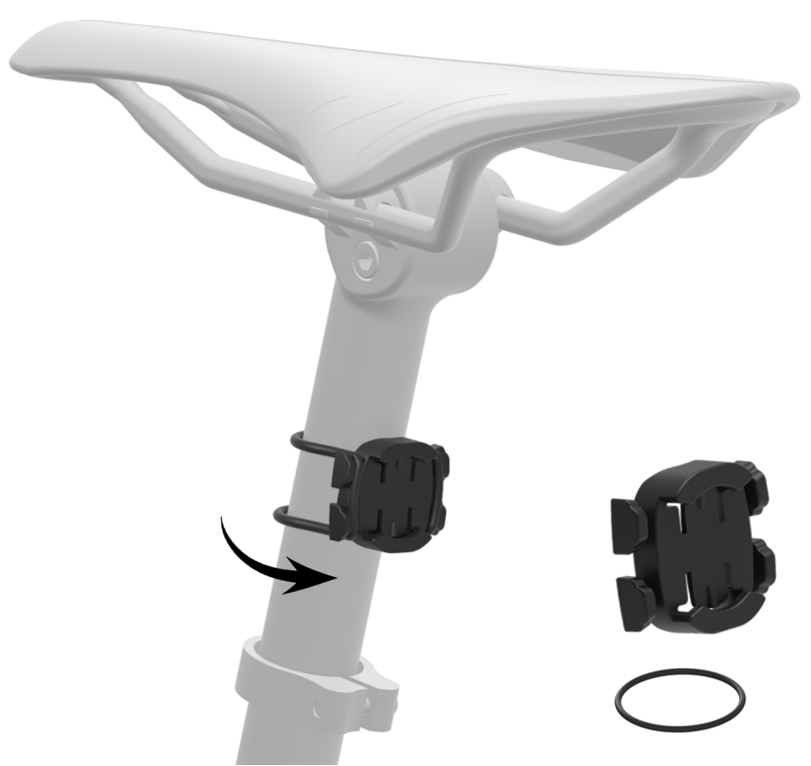
Fig. 12
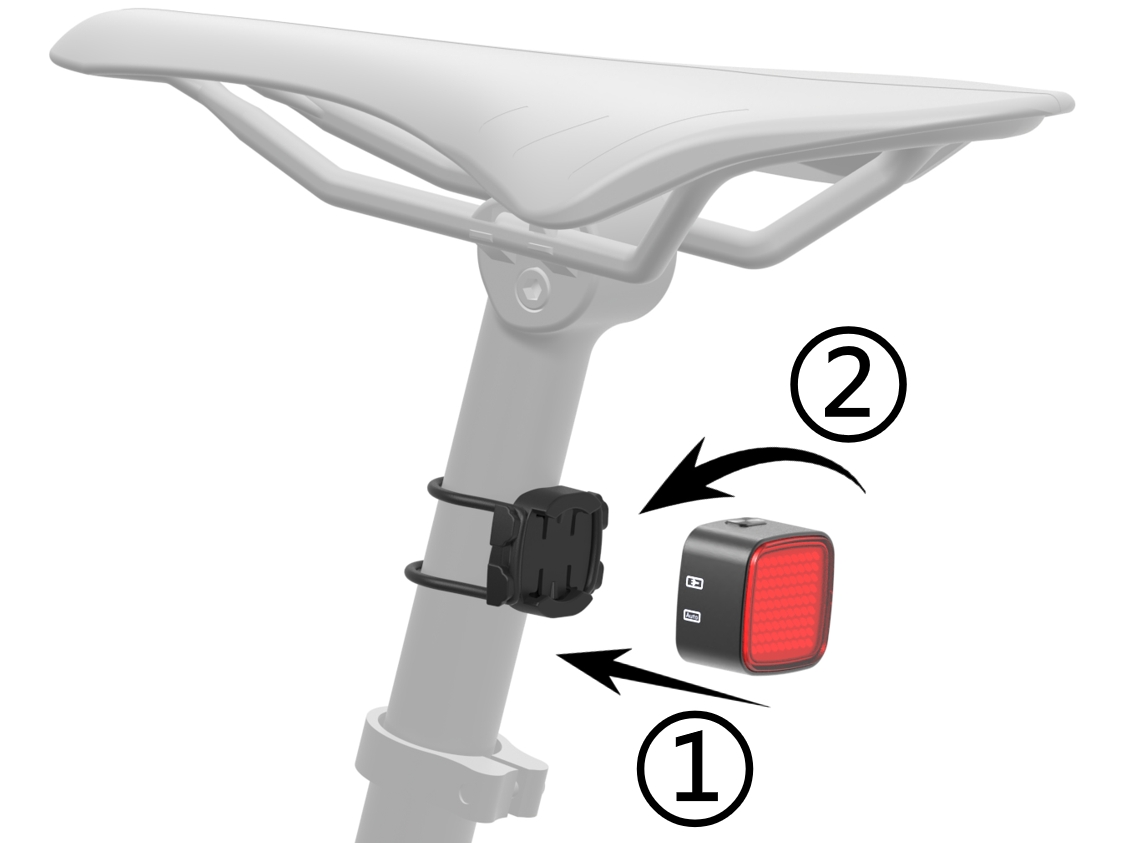
Fig. 13
Saddle mount
Step1:Place the mounting bracket on the seat rails and tighten with the zip-ties. Cut excess length off if need.
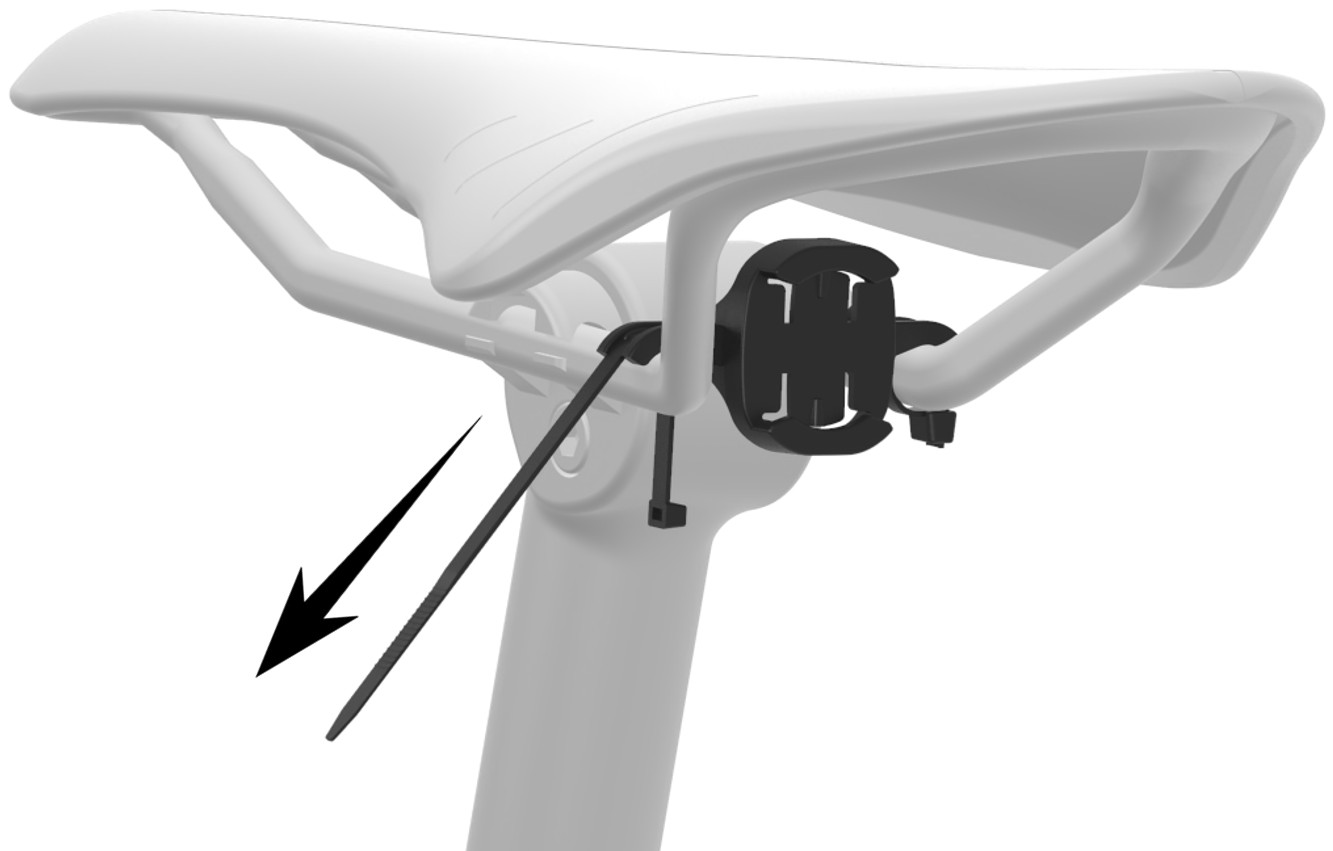
Fig. 14
Step2:Insert the MagiQ and turn clockwise or counter-clockwise until the light is click-in.

Fig. 15
6.Pair remote control
1. Press the MagiQ button to turn on the device
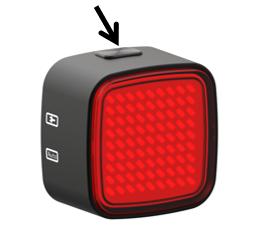
Fig. 16
2. Press and hold the MagiQ button for about 5 seconds until the Bluetooth logo is shown, and then release it.

Fig. 17
3. Press any button on the remote control to turn on the device. If the indicator light stays on, it means the device has been successfully turned on. If the indicator light is not on, please check if the battery is installed correctly or if it is fully charged.
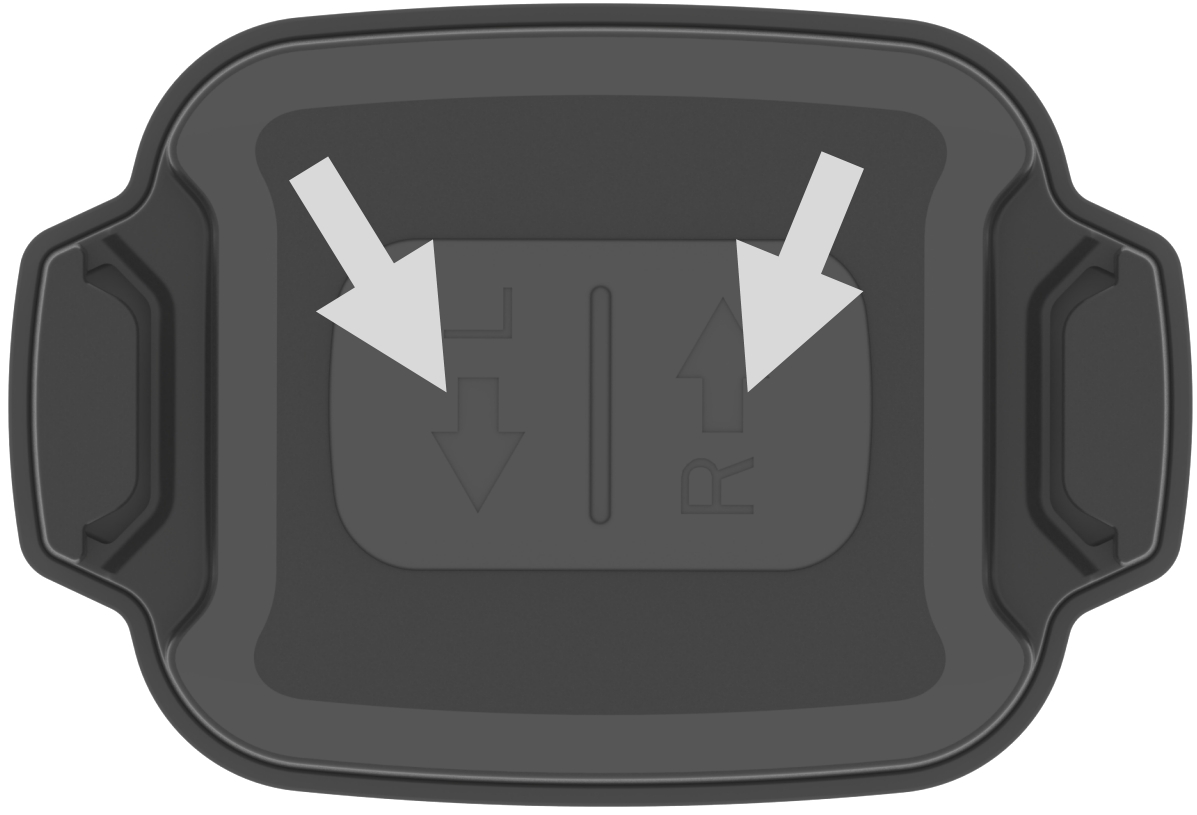
Fig. 18
4. Wait until the remote indicator turn from constantly-on to flashing. This indicating that the remote is connected to MagiQ. In case of failed to connect to the remote, please turn-off the MagiQ and remove the battery from the remote and repeat step 1~4.
7. Charge the battery
When MagiQ shows low battery, please charge the lights through the USB terminal on the back (③ in Fig.1) , with a charging time of 2-3 hours.
To replace the MagiQ remote battery(CR2032), turn anti clock-wise to release and turn clock-wise to close the cover.
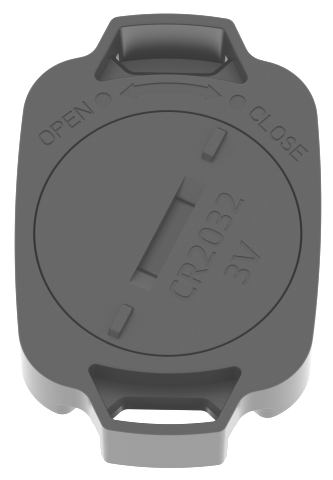
Fig. 18
8.Warranty
The MagiQ is covered by a one year warranty.
Please contact the reseller or Enfitnix Customer Service in case of any quality issues:
Tel: +86 (0)769-2223 4810
Email: ecs@enfitnix.com
![]()
DongGuan Enfitnix Technology Co., Ltd.
Please Note:Specification are subject to change without notices.
© 2024 by Enfitnix Technology Co., Ltd.

Tel: +86 (0) 769 22234810 Email: sales@enfitnix.com
Dongguan Enfitnix Technology Co., Ltd.
Address: 1703, Block 2, No.11, LiaoBuYanHeNan Rd.,SongHuZhiGu Sci&Tech Park, Liao Bu, Dongguan, Guangdong, China. Postcode:523000
Enfitnix Technology North America Inc
Address: 4101 Power Inn Road, Suite A, Sacramento CA 95826

点击右上角
分享给朋友吧
Copyright @ Foreign Trade Template Station 2020 Site Map
